(開箱) GIGABYTE GTX 960 4G * 2 - Keras 1.0.6 + Scikit-learn 0.17.1, cuDNN v4 + Cuda Tookit 7.5, Ubuntu x64 14.04 + TensorFlow 0.8 安裝教學
這篇年代有點久遠,陸續有不少更新,請改參考以下連結或更多文章
https://github.com/Deep-Learning-101
https://huggingface.co/DeepLearning101
https://github.com/Deep-Learning-101
https://huggingface.co/DeepLearning101
2016/06 自己添購(開箱) GIGABYTE GTX 960 4G * 2
2017/01 自己添購(開箱) 技嘉GTX1080 XTREME GAMING 8G
2018/05 公司投資添購(開箱) NVIDIA TITAN V + NVIDIA TITAN XP
2023/08 公司添購 RTX 6000 Ada 48 GB * 2 和 A 100 80GB * 4
2023/08 公司添購 RTX 6000 Ada 48 GB * 2 和 A 100 80GB * 4
2024/05 公司添購RTX 6000 Ada 48 GB * 8 * 2
這篇主要說明的是 深度學習 的 TensorFlow & Deep Learning 的源碼 安裝 操作 教學
這篇算是 Tensorflow 的 step by step ~ 如何從原始碼來打造 GPU 版的 TensorFlow 來做深度學習的卷積類神經網路 ... 就是 " 手把手教你怎樣用 "的教學文
包括了怎樣建置圖片開始做分類的整個過程 ... 主要是灌 ubuntu 14.04跟準備顯卡,還有安裝 CUDA Toolkit、CUDNN 這樣;文略長請務必看完再開始動手 ... 做研究真的要捨得投資然後自己建環境比較實在點 !

RSA USA 2016:http://blog.twman.org/2016/03/RSA2016.html
37th IEEE Symposium on Security and Privacy 2016:http://blog.twman.org/2016/05/IEEESP2016.html

老話一句,官網的文件要好好的讀完跟感受它在寫啥,雖然看官網原文文件很囧 (嗯 ? 別說英文不好?因為我英文不見得比你好到那去) ! 有些東西真的不容易幾句話解釋,硬要舉個例子的話,你覺得如果我不會寫程式,有可能像谷阿莫那樣用幾句話幾分鐘教會我嗎 ? 可以的話就好啊 ! XD ... 官網在這: https://www.tensorflow.org/get_started/os_setup


http://24h.pchome.com.tw/prod/DRAD1K-A9006GCP8?q=/S/DRAD84


於是就在跟價格以及其CP值考量下 ... 馬上請師父幫忙訂貨再外加 3隻 8G 的 DDR3,還有用之前幫朋友組的板子就這樣在公司把系統給架起來了 !


我這次的軟硬體相關資訊,2016/08/24更新,又噴了好多張小朋友,嘆
cuDNN v4, Cuda Tookit 7.5, TensorFlow 0.8, Keras 1.0.6, Scikit-learn 0.17.1
Python 2.7.6, JAVA 1.8.0_91, Ubuntu x64 14.04
Intel Core i7 4770, GIGABYTE Z87-HD3, Intel S320/S520 SSD
ADATA DDR3 8GB * 4, GIGABYTE GTX 960 4G * 2


當然,如果只是想玩玩 TensorFlow,並不需用到 GPU 其實上面就提到了之前寫過直接用 docker 的 ... 有空再來補充可以啟用 GPU 的 Docker 教學 ... 那麼廢話完了就開始來看看我這次是怎樣建系統的 ...

首先是直接 su - 無須輸入密碼即可換root,請好好保護自己帳號,建議完全實體隔離外網,不然 ... 很危險的啊 !

編輯/etc/pam.d/su檔案:
vi /etc/pam.d/su
刪除註解:
auth required pam_wheel.so
auth sufficient pam_wheel.so trust
新增wheel群組:
sudo addgroup wheel
將帳號加入wheel群組:
sudo usermod -aG wheel tonton
直接切換root身分不用再打密碼了:su -

這邊要記得先安裝幾個東西: apt-get install openssh-server nfs-kernel-server nfs-common
如果你跟我一樣會用到 vncserver 那要記得加這個
apt-get install gnome-panel gnome-settings-daemon metacity nautilus gnome-terminal # apt-get install gnome-panel gnome-settings-daemon metacity nautilus gnome-terminal vnc4server gnome-core
接著是要確認一下 python 版本 ... ubuntu 14.04 裝好是 2.7.6 ... 接著就是更新安裝一下相關要用到的套件;這算是安裝 python 的套件來使用的 !

apt-get install python-pip python-dev build-essential
pip install --upgrade pip

pip list | awk '{print $1}' | xargs -n 1 pip install --upgrade

接著要安裝的是 Java 8 (這是用來跑 bazel 的,也就是源碼安裝)

add-apt-repository ppa:webupd8team/java
apt-get update
apt-get install oracle-java8-installer
apt-get install oracle-java8-installer

裝好後就用這兩個指令驗證一下安裝的版本吧
java -version
javac -version


然後就是要裝 bazel 了,這邊要注意上下圖裡指令" [arch=amd64] "的不同
echo "deb [arch=amd64] http://storage.googleapis.com/bazel-apt stable jdk1.8" | sudo tee /etc/apt/sources.list.d/bazel.list
curl https://storage.googleapis.com/bazel-apt/doc/apt-key.pub.gpg | sudo apt-key add -
apt-get update
apt-get install bazel
apt-get upgrade bazel

不然會碰上這樣的問題
W: 無法下載http://storage.googleapis.com/bazel-apt/dists/stable/InRelease Unable to find expected entry 'jdk1.8/binary-i386/Packages' in Release file (Wrong sources.list entry or malformed file) E: Some index files failed to download. They have been ignored, or old ones used instead. 的錯誤

再來就是要安裝 Nvidia 的驅動了 ... 但我發現其實裝 CUDA 會自動幫你裝驅動

add-apt-repository ppa:xorg-edgers/ppa -y
apt-get install nvidia-346

接著就可以使用 nvidia-smi 來檢查

或者是用 dpkg -l | grep nvidia 跟 cat /proc/driver/nvidia/version

再來就是整個過程最重要的 cuda 跟 cudnn 了,這邊要注意你的顯卡是 pascal 還是上個世代,要注意用那個 OS 跟那個版本 !
CUDA:https://developer.nvidia.com/cuda-downloads
cuda 7.5 下載網址: https://developer.nvidia.com/cuda-75-downloads-archive
cudnn 下載網址 https://developer.nvidia.com/cudnn (需註冊)

export LD_LIBRARY_PATH="$LD_LIBRARY_PATH:/usr/local/cuda/lib64"
export CUDA_HOME=/usr/local/cuda
需要注意的是這兩個非常重要的變數設定,這點在原文網頁上有說明
https://www.tensorflow.org/versions/r0.8/get_started/os_setup.html
The GPU version (Linux only) works best with Cuda Toolkit 7.5 and cuDNN v4. other versions are supported (Cuda toolkit >= 7.0 and cuDNN 6.5(v2), 7.0(v3), v5) only when installing from sources.

直接下載 cuda_7.5.18_linux.run 後執行可以連驅動一起幫你裝或者是解壓再獨立安裝
wget http://developer.download.nvidia.com/compute/cuda/7.5/Prod/local_installers/cuda_7.5.18_linux.run
./cuda_7.5.18_linux.run -extract=/tensorflow/cuda
./cuda-linux64-rel-7.5.18-19867135.run
./cuda-samples-linux-7.5.18-19867135.run
./cuda-samples-linux-7.5.18-19867135.run


/usr/local/cuda-7.0/bin/uninstall_cuda_toolkit_7.0.pl
rm -rf /usr/local/cuda
rm -rf /usr/local/cuda-7.0/

再來就是處理 cudnn 了
cuDNN是指CUDA Deep Neural Network library,是NVIDIA針對深度學習所推出的deep neural networks GPU加速程式庫;無法在主機上直接下載安裝,必須先到nVidia網路註冊會員後才能下載安裝

cp include/cudnn.h /usr/local/cuda-7.5/include/
cp lib64/libcudnn* /usr/local/cuda-7.5/lib64/

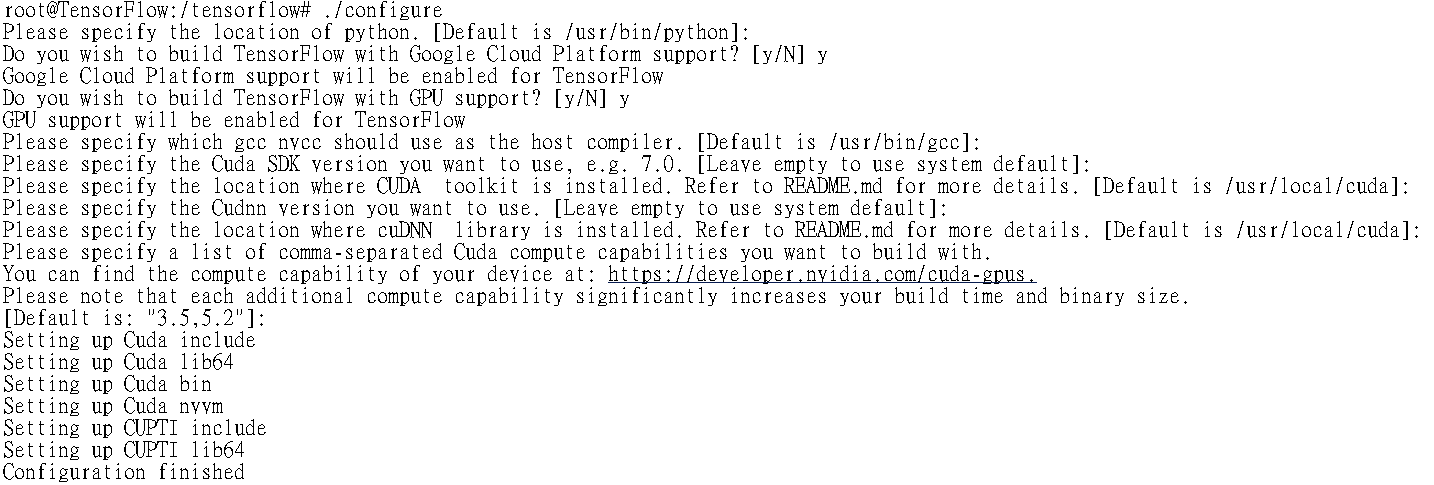
下載 tensorflow 時也要注意版本的問題 ... 直接用 git,然後 ./configure,注意其中 GPU Support ,剩的應該都預設就可以了
git clone --recurse-submodules https://github.com/tensorflow/tensorflow
cd /tensorflow/tensorflow
./configure
./configure
/tensorflow /tensorflow
Please specify the location of python. [Default is /usr/bin/python]:
Do you wish to build TensorFlow with Google Cloud Platform support? [y/N]
No Google Cloud Platform support will be enabled for TensorFlow
Do you wish to build TensorFlow with Hadoop File System support? [y/N]
No Hadoop File System support will be enabled for TensorFlow
Found possible Python library paths:
/usr/local/lib/python2.7/dist-packages
/usr/lib/python2.7/dist-packages
Please input the desired Python library path to use. Default is [/usr/local/lib/python2.7/dist-packages]
/usr/local/lib/python2.7/dist-packages
Do you wish to build TensorFlow with GPU support? [y/N] y
GPU support will be enabled for TensorFlow
Please specify which gcc should be used by nvcc as the host compiler. [Default is /usr/bin/gcc]:
Please specify the Cuda SDK version you want to use, e.g. 7.0. [Leave empty to use system default]:
Please specify the location where CUDA toolkit is installed. Refer to README.md for more details. [Default is /usr/local/cuda]:
Please specify the Cudnn version you want to use. [Leave empty to use system default]:
Please specify the location where cuDNN library is installed. Refer to README.md for more details. [Default is /usr/local/cuda]:
Please specify a list of comma-separated Cuda compute capabilities you want to build with.
You can find the compute capability of your device at: https://developer.nvidia.com/cuda-gpus.
Please note that each additional compute capability significantly increases your build time and binary size.
[Default is: "3.5,5.2"]:
.......
INFO: Starting clean (this may take a while). Consider using --expunge_async if the clean takes more than several minutes.
......
INFO: All external dependencies fetched successfully.
Configuration finished

基本上源碼到這邊就是裝好了,再來看看直接用 pip 的話會怎樣 ... 這邊就是注意一下官網的說明: https://www.tensorflow.org/get_started/os_setup#pip_installation
pip install https://storage.googleapis.com/tensorflow/linux/gpu/tensorflow-0.8.0-cp27-none-linux_x86_64.whl


接著就是編譯範例目標程序,試試看是不是正確的開了GPU支持

bazel build -c opt --config=cuda //tensorflow/cc:tutorials_example_trainer
bazel-bin/tensorflow/cc/tutorials_example_trainer --use_gpu

然後你就要看到像上面的圖片結果,這是用GPU迭代計算一個2×2矩陣的主特徵值

接著再來試試用 gpu 來訓練你的第一個TensorFlow神經網絡模型 MNIST

could not set cudnn filter descriptor: CUDNN_STATUS_BAD_PARAM

如果像碰到上圖這樣的 ImportError: libcudart.so.7.5 的錯誤,表示是 cuda 跟 cudnn 的問題 ... 我最後是用 cuda 7.5 跟 cudnn4 ... 供大家參考一下 ! 意思是我前面講好幾次版本問題,你都沒在看啊 ! 囧


上面是我測試成功的截圖

至於上面這則是 cifar10 的測試

這張則是 nvidia-smi ... 然後再補一張雙顯卡的


最後,就看看用 CPU 和 GPU 兩者跑起來的差別吧 !

最後就是先講一下 Transfer Learning 是指人們若是擅長解決一類任務,那就應該能遷移其中的理解內容,用它來解決另一類相關的問題。實現遷移學習的方法之一就是移除網絡的最後一層分類層,並且提取CNN的倒數第二層。好處就是你只要準備個幾千張圖片
可以參考我前陣子1個多月前寫的這一篇: http://www.freebuf.com/articles/paper/108123.html
如何用深度学习识别网络欺诈?

這個的做法相對的簡單很多,所以直接貼上參考的文件跟幾行指令來簡單說明;Image Recognition:http://www.csdn.net/article/2015-12-16/2826496
https://www.tensorflow.org/versions/master/tutorials/image_recognition/index.html
wget https://storage.googleapis.com/download.tensorflow.org/models/inception_dec_2015.zip -O tensorflow/examples/label_image/data/inception_dec_2015.zip
unzip tensorflow/examples/label_image/data/inception_dec_2015.zip -d tensorflow/examples/label_image/data/
如果你有看上面兩個中英文連結的內容,那你一定不會忘記下載 Inception 的 Model ... 那 Inception-v3 是什麼呢 ? 嗯 ! 請自己讀一下論文吧 !
Rethinking the Inception Architecture for Computer Vision
cd /tensorflow/
bazel build -c opt --copt=-mavx tensorflow/examples/image_retraining:retrain
bazel-bin/tensorflow/examples/image_retraining/retrain \
--bottleneck_dir=/tf_files/bottlenecks \
--model_dir=/tf_files/inception \
--output_graph=/tf_files/retrained_graph.pb \
--output_labels=/tf_files/retrained_labels.txt \
--image_dir /tf_files/flower_photos
下載動作完成後,就是上面的指令,tf_files 指的是你要做辨識的整個資料夾,接著就是把你的圖放到你上面指定 image dir 的地方,這邊有個好處就是你不用把圖做成一樣大小也不用統一固定成 jpg 或者 png
bazel build tensorflow/examples/label_image:label_image && \ bazel-bin/tensorflow/examples/label_image/label_image \
--graph=/tf_files/retrained_graph.pb \
--labels=/tf_files/retrained_labels.txt \
--output_layer=final_result \
--image=/tf_files/flower_photos/XXX.jpg
接著就是上方的指令,這樣你就能執行圖形分類的判斷了 ! 如果你對 IRMA 這套開源工具有興趣的話,還可以自己寫個小程式 (是的 ! 我只會寫比較簡單的) 然後讓它可以自動上傳跟分析,或者是自己用 cxFreeze 來編譯成執行檔使用
如果你已經準備了數十萬以上的圖片來跑 Inception-v3 的訓練,參考以下這篇:https://github.com/tensorflow/models/tree/master/inception
這邊先附上怎樣建給 Inception 使用的圖片的數據 ! 簡單講就是把你想要分類的圖片都先用資料夾分別 label 好
https://github.com/tensorflow/models/blob/master/inception/inception/data/build_image_data.py


cd /tensorflow/tensorflow/models/inception
bazel build inception/build_image_data
bazel build inception/build_image_data
bazel-bin/inception/build_image_data --train_directory="${TRAIN_DIR}" \
--validation_directory="${VALIDATION_DIR}" \
--output_directory="${OUTPUT_DIRECTORY}" \
--labels_file="${LABELS_FILE}" \
--train_shards=128 \
--validation_shards=24 \
--num_threads=8

要注意幾個變數的設定了,可以看出一樣還是用 Inception-v3 的 model,但是訓練的圖片數據都換掉了 !
MODEL_PATH=/cmcm/Inception/inception-v3/model.ckpt-157585
FLOWERS_DATA_DIR=/cmcm/Inception/data/
TRAIN_DIR=/cmcm/Inception/train/
EVAL_DIR=/cmcm/Inception/eval/

cd /tensorflow/tensorflow/models/inception
bazel build inception/flowers_train
bazel-bin/inception/flowers_train --train_dir=/cmcm/Inception/train/ \
--data_dir=/cmcm/Inception/data/ \
--pretrained_model_checkpoint_path=/cmcm/Inception/inception-v3/model.ckpt-157585 \
--fine_tune=True --initial_learning_rate=0.xxxx \
--input_queue_memory_factor=xx --batch_size=x \
--max_steps=xxxxx
接著做完上面的 train 之後,就可以試著來做 eval 了 !
bazel build inception/flowers_eval
bazel-bin/inception/flowers_eval --eval_dir=/cmcm/Inception/eval/ \
--data_dir=/cmcm/Inception/data/ --subset=validation --num_examples=30000 \
--checkpoint_dir=/cmcm/Inception/train/ --input_queue_memory_factor=24

順利成功跑完的話,你應該要可以看到上圖的 eval 了 !


跑到 1萬次時整個效率跟準確度就整個更往上拉了,最後就像前面寫到的,一樣可以再跟 IRMA 整合或者是編成執行檔來玩玩你自己的圖形辨識

最後可以看一下上面的 tensorboard

很高興你非常有耐心的看到這邊 ... 這篇也算是我花了不少時間所獲得的感想,或許你會想問那麼我要怎樣自己建自己的模型呢 ? 又要怎知道到底那些神奇的參數要怎樣設定呢 ? 嗯 ! 知乎上面有這樣的問題跟答案 !
https://www.zhihu.com/question/28018134
Q: 深度学习(以卷积神经网络CNN为例)的各维度参数调节问题?
A: 經驗值、買機器 .....
那麼講中文的人這樣做了說明,所以翻一下英文給你瞭解一下
How do we know the number of layers and their types?
This is a very hard question. There are heuristics that we can use and often the best network structure is found through a process of trial and error experimentation. Generally, you need a network large enough to capture the structure of the problem if that helps at all.
現在知道為啥我前面放了買 GPU 還有買 50" 電視的原因了吧 ?

我只想說,辦公室的 27" * 3 感覺真的不能滿足我了啊 !
( 哦 ! 對啦,有很大原因是因為辦公室噪音值實在是太高了,我完全不能理解怎有那麼多話好聊,可以這樣聊一整天,要是以前 ..... 早就用力幹勦了 )
最後放上幾個我參考到的連結
編譯 TENSORFLOW W/ CUDNN V5
MachineLearning - Tensorflow 安裝
[CUDA] 在 Ubuntu 14.04 上裝好 CUDA 7.0
[ Linux ] 在 Ubuntu 14.04 上安裝cuda 7.0 (For testing Theano)
Tensorflow 0.8.0 安装配置方法
看到這邊或許還是一頭霧水,但還是老話一句,真的官網的文件要好好的讀完跟感受它在寫啥啊 !